
Location
Manufacturing the parts, and building the base for [The_Cube]
Perhaps you know already: [The_Cube] holds 1.3 m3 of slurry, which has about the same density of water. (“1.3 m3” is a bit more than 340 gallons, or 46 ft3. The total volume of [The_Cube] is greater than any of those numbers because some of the space is devoted to the big bubble of biogas in the top 6 inches of the digester.)
That slurry has a weight of very nearly 3,000 pounds, so a full [Cube] is not the sort of thing that you would put on your average coffee table….

The reason I mention this is that all of that slurry weight, and indeed the weight of the materials that make up [The_Cube], has to be supported by the base of the digester, so the design of that base has taken this into account. This post is about building the base of our digester; to learn more about the design, you may want to purchase plans for [The_Cube]. For the time being, while we are still in the process of finalizing the drawing set, a draft, early version of the drawing set is available as explained here, for a discount, and with the promise that when the drawing set is finished, purchasers of the draft drawing set will be sent the final product. It’s a good deal.
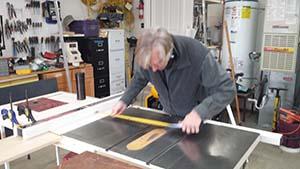
So, obviously the first thing we manufacture and build in the process of creating a new [Cube] is the base. I started this particular build by visiting my good friend Don Sires (above; thanks again Don!), who has repeatedly helped me in this project. Don is a builder, par excellence, and he has a very good table saw. I’ve tried any number of ways to cut polysty panels from their purchased size (4'x8') down to whatever size is needed for the various parts of [The_Cube], and at least as far as I’m concerned, the best way to cut polysty is with a table saw.
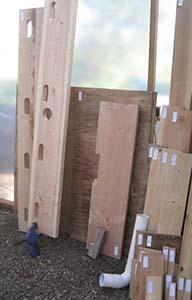
If a picture is worth a thousand words, then get ready for a fair-sized book:
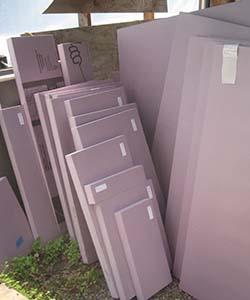
The larger pieces to the right are to make the side panels, the base and the top. The smaller panels to the left will be put into the hot water sump, the instrumentation box, and some other places.
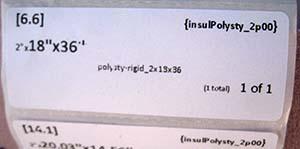
To assist folks in making parts, we supply labels which describe the parts. As each part is made, I recommend peeling the label off the paper roll or sheet, and putting it on the part. In another post I will describe these labels in greater detail, but for the moment, note among other things that the material for and the dimensions of this part are clearly shown, and that only one of this part (“1 total”) is needed.
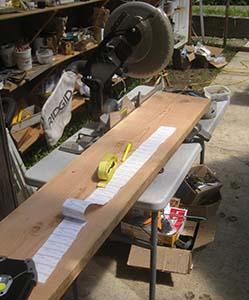
Here a roll of labels is laid out on a 2x12 in prep for making the front and back long boards for the stand.
After cutting the lumber, some parts need to be modified. The labels indicate which parts need mods, and the drawing set explains modification that is needed. Here are the parts for the digester stand, with labels and mods.
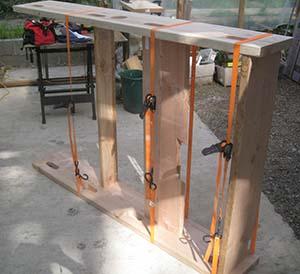
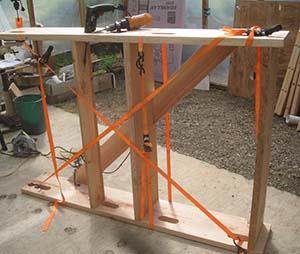
The first few parts of the stand are held together (and square) with ratchet straps. This is called "jigging", and jigging and jigs are used extensively in building [The_Cube].
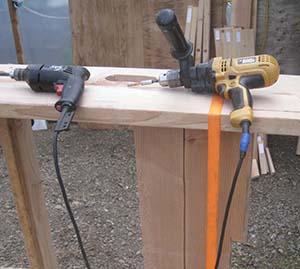
To speed up the build, we use at least two electric hand drills. One (in this picture, the black one on the left) has a bit to make pilot holes where the screws should be put. The other has a driver bit to ream the screw into the wood.
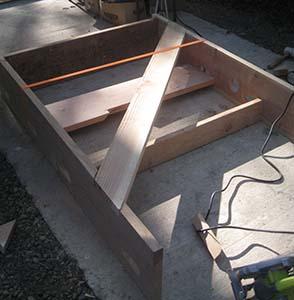
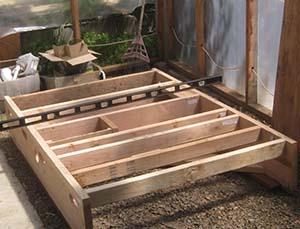
After the first two “joist” (shorter) boards have been screwed into the long outside base boards, the next step is to put in the cross-brace, which will keep things square. Then the remaining joist boards will be jigged and screwed…
…like this. The remaining joist boards (seven total) will be similarly put in place, and held by ratchet straps while everything is screwed together.

After putting in the remaining joist boards, then cutting parts for and completing the drain box (seen in the middle front of the drawing image, surrounded by a circle labeled “A”), the stand will (should!) match the drawing.
[The_Cube] must be put somewhere level. My spot is inside the shelter I designed and built for experimenting and building the evolving design for [The_Cube]. I leveled the gravel in preparation for putting [The_Cube] in this corner.
The stand in place, with the same sad rake still in the corner of the corner.
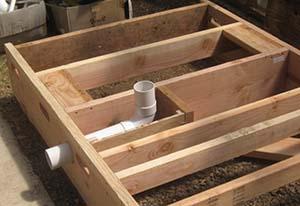
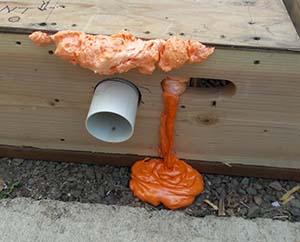
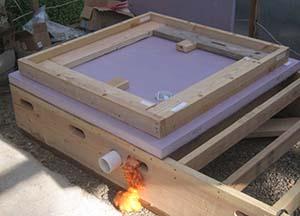
You can see the drain box in the front middle of the stand, with the drain pipe temporarily in place. [The_Cube] should very rarely, if ever, need to be drained, but if that necessity arises, then the slurry can be released through this pipe. (One hopes the digester has not been put in your bedroom….)
As I will discuss in another blog, I am “instrumenting” the digesters I build. (That’s what the wire stuffed into the drain pipe is about.) Here, you see how the drain pipe is to be insulated within the box. Note that I have failed to sprinkle or spray water into the foam as I lay it down, until I wise up toward the end of filling the box. Water is necessary because that’s what “cures” the foam….

…And as you can see in the last frame, I used a lot of foam. When I put the base plywood on top of the stand…
…I found what I should have expected. The foam kept… foaming. That was partially because I used too much, and partially because I did not put down a layer, sprinkle it with water, wait a bit, put down another layer, use more water and so on. How about if I learn the lesson for both of us, eh? (The plywood is screwed to the stand in this step.)
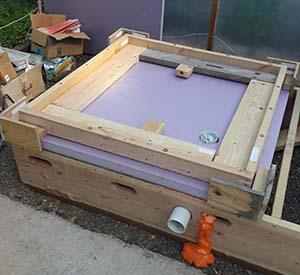
The next step is to put the base poly on the base plywood, then add the “base square”. The bottoms of each of the four side panels will be secured to the base square, so it needs to be quite strong to resist the force of water pressure. The corner jigs (as shown) insure proper alignment of poly and square.
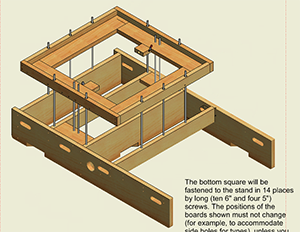
In the drawing, you can see how the base square is tied to the stand at 14 places. (Each of the vertical gray “rods” represents a 6 inch torx screw….) Hoo rah!
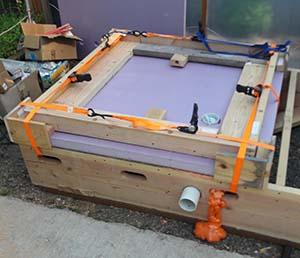
Once again, we use jigging. The pressure of the ratchet straps will allow the corner jigs to hold the based poly and base square in alignment, until all the screws can be put in place.
Ta da! The finished base….! Next step: putting on the panel right.