

Location
SPN 03 of [The_Cube]: Making the panel left
Of the four side panels that are part of [The_Cube], the panels right and left largely mirror each other, and the same is true of the panels front and back. Besides making things a bit simpler, there are two basic reasons why this is the case.
The insulation is the container!
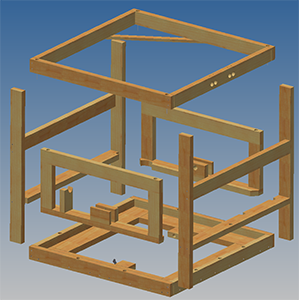
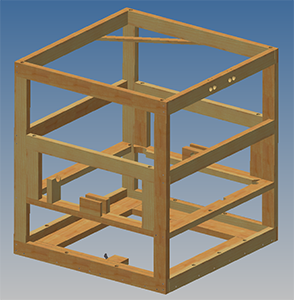
First, if you take some time to try to understand how you might put six polysty panels together to create a hermetic box, I think you will find that the side panels should rest on the bottom panel, and the top panel should mirror that. And while there are several ways that the four side panels might be put together, the approach we have taken is to have two panels that are “captured”, and two panels that “capture”. That may not make sense, but perhaps if you meditate on the video on the right side, you will see what we mean. That is, the front (and back) panels are larger than the right and left panels. So the larger panels ‘capture’ the narrower panels:
Second, the inside support assemblies need to mate, one with another, so the digester gains strength.
The consequence of these things, as I started by saying, is that the panels right & left (and front & back) mirror each other, at least to a degree. (The panel right hosts the hot water in and out, and the four pipes of the Gas Collection System, so it is more complex than the panel left; but setting those pipes and the added insulation required to protect them to one side, the two panels are mirrored.)
That also means that the jigging used to make, say, the panel left is the same as the jigging used to make the panel right. If you are reading these blogs in order by SPN number, then you will have already read about how to jig and manufacture the panel right. If everything I’ve said makes sense, then you will know at this point what you will see and read about making the panel left will be quite familiar, because it is very much the same as the process used for the panel right.
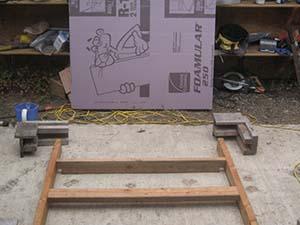
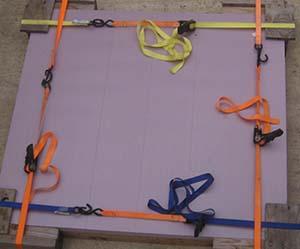
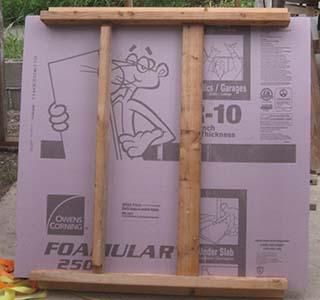
First lay out the corner jigs, the inside support assembly, and make sure that the polysty panel for the panel left is positioned correctly so the writing will be on the inside.
Make sure that the ratchet straps are also placed where they need to be. (I forgot to do this when making the panel right.)

Put the polysty panel down and position the straps on top of it.
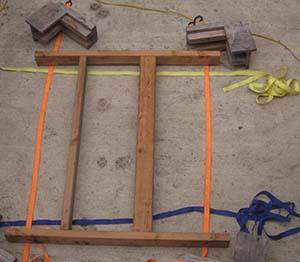
Thread the straps into the ratchets and (begin to) tighten them, using the rubber mallet as described in the blog about making the panel right.
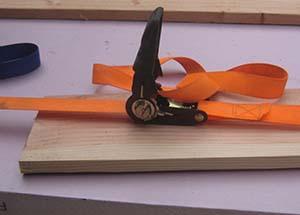
It may not be necessary, but I usually protect the polysty from the ratchets by using a piece of scrap lumber.
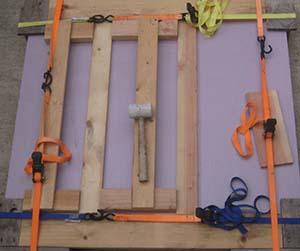
Put the horizontal outside support boards on the panel left, along with the jigs that keep those two boards in the proper postions.
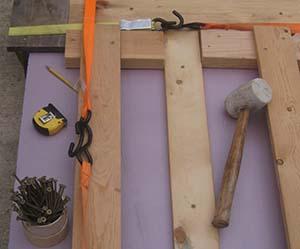
Grab the screws and begin to make holes (drill #1) and screw in the torx screws (drill #2). Remove the straps when you are finished.
That’s it. The panel left is complete.