![The pump/heater is the unit that (obviously) heats the digester. For this first phase of the development of [The_Cube], I have not wanted to introduce any unnecessary complications, so for the time being, I am using electricity as the energy source for heating the digester. Some time in the future, if my efforts are rewarded with sufficient success, I will be working on solar heating options. But not just yet.](https://completebiogas.com/sites/completebiogas.com/files/styles/large/public/_pump-heater-dwg_partial.png?itok=hoaYtNCg "The pump/heater is the unit that (obviously) heats the digester. For this first phase of the development of [The_Cube], I have not wanted to introduce any unnecessary complications, so for the time being, I am using electricity as the energy source for heating the digester. Some time in the future, if my efforts are rewarded with sufficient success, I will be working on solar heating options. But not just yet.")
Location
Making the Pump-Heater, Part 1: the end caps
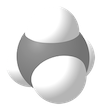
The pump/heater is the unit that (obviously) heats the digester. For this first phase of the development of [The_Cube], I have not wanted to introduce any unnecessary complications, so for the time being, I am using electricity as the energy source for heating the digester. Some time in the future, if my efforts are rewarded with sufficient success, I will be working on solar heating options. But not just yet.
As you can see from the drawing detail to the right, the three main parts of the pump/heater are first the shell, an 8" dia., 17" length of pipe that encloses most of the parts of the pump/heater. Second, then, is the heater itself, which is a 1000-1500 watt coil epoxied to a 1.25" dia bit of pipe that, in turn, will be attached to one of the end caps of the pump/heater. (In the drawing, that is the right side end cap.) Then finally, the other end cap (left side) hosts the third main part, a fountain pump, as well as a few bits of instrumentation including an overtemperature switch and a PID temperature probe, which I will discuss in another post about instrumentation.
In this first blog about the pump/heater, I want to show you about making the end caps. It starts with a jig, no surprise. (More information about that jig is found here.)
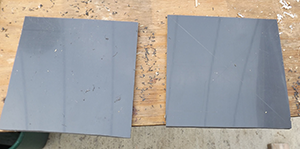
For my end caps, I’ve been using 3/8" PVC plastic sheets; but that’s expensive, so I will be exploring other alternatives.
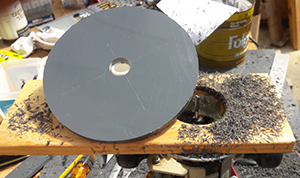
Of course, I could have left the end caps as squares, but I prefer them to be round, so that I can position the finished pump/heater in any orientation I want without having corners sticking out and pushing the unit around.

Following the design which my drawings show, I put 1 1/16" holes in the very center of both ‘end-cap’ squares, which allows me to use a 3/4" PVC pipe stub as the pivot when routing the squares into circles. To make these holes, I used a Forstner bit in my drill press; a hand electric drill would work too, if you are careful.
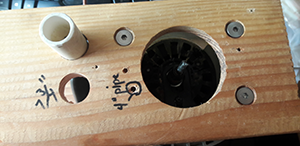
When using the jig to make the pump/heater end caps, I have two choices for a hole to hold my stub of 3/4" pipe. I chose the upper one (which as shown as a pipe stub in it), which gives me 8" circles. (The other one would give me a 7 3/4" circle.) You can’t see it in this image, but there are also 1/16" holes drilled from the edge of the jig board into each one of the pipe holes. When I put the stub pipe in, I also put a screw into the appropriate edge hole, and the screw holds the pipe stub firmly in place. (For more information on the jig being used here, see this blog post.)
[Click pic for larger image] It’s hard but not impossible to see the 1/4" router bit toward the right side middle of this image. I put it into the router such that it sticks up about 1/2" above the jig board, so that the bit will chew through the 3/8" PVC square.
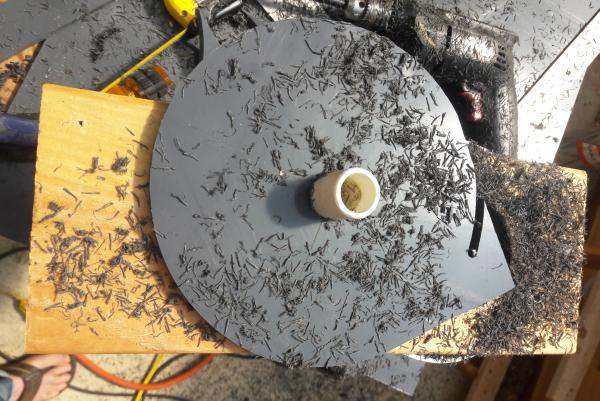
Also, as you will see it you try this, you will have to pull the square the opposite direction the router bit wants to grab and tug it. In this picture, the router bit was rotating counter-clockwise, and I was pulling the square around clockwise: the part of the bit on the pivot side wanted to tug the square counter-clockwise, and my experience is that unless you rotate opposite, the router bit will grab the piece and run away with it. (Try it and you’ll see.)
In any case, I'm very happy with the result.
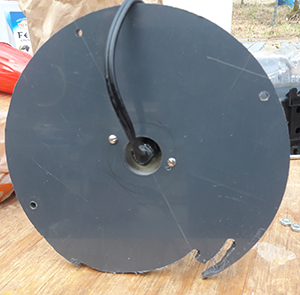
I also tried to make circles using my drill press and the same router bit, but that failed miserably. (See the bottom right of this end cap?) And why did it fail? First of all, the various parts of the drill press kept moving relative to one another, so that I was not cutting a circle but rather a spiral. And second, because the rotational speed of the drill press is so much lower than that of the router, it makes a much rougher cut. Routers are less expensive than drill presses, so from almost all points of view, making the end caps with a router vs. a drill press is a good thing, unless you have a much better drill press than I do.…