
Location
If you have paid any attention to the saga of [The_Cube], you know that up to this point I was aiming at heating the digester by circulating hot water. I have done a lot (a lot!) of work on designing a sump to hold residual water, a heater/pump to... well of course, heat and circulate the water, and push that water through my beloved HEx (heat exchange) units. (Of all of those units, lovingly designed, experimented with, evolved and improved, I will miss the HEx units the most.)
But progress, right? Continuous improvement. Sometimes the things we love hold us back. RIP HEx.
What I realized that caused this micro-earthquake in my design was that I was heating and circulating water in the hope that, soon, someday, I would be able to utilize other sources of energy besides electricity. That is, where I am heating and circulating water, I can (perhaps) heat the water with biogas or direct sunlight. But if I just decide, for the time being, that the digester will be heated only by electricity, then the problem becomes much simpler, because then, with the design I will describe in some detail below, the parts count and digester complexity is greatly reduced.
The first thing to say is that this heater is designed on the applicable physics and the relevant facts of the characteristics of slurries, which are mixtures of organic matter and water, the stuff that we feed the digester to make biogas.
I assume, by the way, that your digester is well-insulated. Otherwise, why would you even consider heating it? That would be like buying a refrigerator and expecting it to work without a door. It makes no sense. As regards [The_Cube], the insulation— as you know— is the container, so few worries there.
Physics says...
Recall that heat is transferred in three ways: conduction, convection and radiation. Convection is the process of warmer fluids expanding and rising, then cooling, condensing and falling. (This is what causes wind, for example.) But slurry with a useful amount of solids in it (5%-10%) cannot be expected to convect, because heating it will not change the density of the solids in it, and the solids will resist being pushed around by the gentle forces of convection. Likewise because light and other radiant energy is blocked by the opaque slurry, radiation is not practical as a means of heating the whole digester, at least from the inside. That leaves only conduction, which is the process by which most solids heat up. Put one half of a pan over the fire, and the other half will, fairly soon, heat up, because heat will travel through the solid aluminum or iron from the hot side to the cooler side.
Further, physics says that if we want to transfer heat from a hotter fluid (water or air) into a cooler fluid, through a barrier (like our pipe), then more heat will be transferred with
- an increase in the temperature differential;
- a decrease in thickness for any given barrier material;
- an increase in surface area, and probably; with
- an increase in the mass of the hotter fluid.
So based only on these facts, we will
- want the temperature of the hotter fluid, the water in the pipe, to be as high as is reasonable,
- and also, we will want to keep things moving— to replace heated slurry with slurry needing-to-be-heated— (that is, we will need adequate agitation);
- want the pipe to be as thin as is reasonable; and
- want it to be large as is reasonable to offer the greatest surface area.
A larger pipe will also hold more water, that increased mass I mentioned. This last criteria has to do with the difference between temperature vs. heat. They are, of course, related. But consider an analogous example: Speed vs. kinetic energy. Imagine the difference between getting hit by a raindrop falling at 20 MPH, and being hit by a dump truck that, through unknown means, has been carried up into the sky and is likewise falling, on you, at 20 MPH. (Ouch?) In the same way, if we have a cup of water at a certain temperature, there will be far less heat in it than in a gallon of water at the same temperature. Thus the amount of energy that can be passed from the inside of the pipe into the slurry depends, in large part, on the mass of the hotter fluid.
As such, we have two reasons for wanting the pipe to be large: because it will have a larger surface area, and because it will store more hot water. But of course, above, I kept saying as much “as is reasonable”. Having a pipe that is too large will crowd out the slurry. So we have to choose the sweet spot.
Limits imposed by slurries...
Likewise, having a temperature that is [only] “as high as is reasonable” is because we face certain other limits.
That is, besides wanting a pipe that is thin, we also want to avoid having anything accumulate on the outside of it, in effect insulating it, or preventing the flow of heat from inside the pipe into the slurry. Inside a digester, of course, everything in contact with the slurry will get coated with a biofilm. That will be impossible to avoid. But as well, the main relevant fact regarding slurry is that on any surface at some (usually fairly high) temperature, slurry will begin to form a crust (AKA ‘fouling’ or ‘mineral fouling’). That crust will impede heat transfer. The exact crust-forming temperature will vary depending mainly on the type of organic matter that is used to make the slurry, the amount of time that slurry is in contact with the barrier material, and so on. But sticking just with temperature, according to the literature— at least for pig manure slurries[1]— mineral fouling does not become a problem until temperatures climb above 50°C (122°F).
[1] Cunault, C., et al. “Characteristics and composition of fouling caused by pig slurry in a tubular heat exchanger” Journal of environmental management 117 (2013): 17-31.
This tendency of slurry to form a crust, by the way, is one reason why it may not be good to put an immersible electric resistance heat coil (like the one at the top of this page) into direct contact with the slurry: it seems likely that a crust would form, impeding heat transfer. And this may become a viscous circle: the heater, surrounded by a crust, cannot be cooled as rapidly. It will probably get hotter and remain hot longer, increasing the tendency to form a crust.
But does it really make a difference? After all, any heat that we put into the digester will find its way into the slurry... eventually. Where else can it go? That is, even if you have a crusty block of hardened slurry around a heating element, it seems as though you would end up with the warmer slurry... Probably, yes, there would be little or no difference, but what other effects might you see? So in answering the question, I can’t say definitively: experiment if you want to.
Even if direct immersion of a heat coil “works,”, the surface area from which heat can be dispersed into the digester will be restricted to the surface area of the heat coil. I tend to think that I can pump more heat into the digester if the coil is surrounded by water which has no organics in it, and which can convect within the pipe that also surrounds it, thus dispersing heat from the whole surface of the pipe. But again, no dogma. I could be wrong. Try it if you like, or better, do the experiments required to prove which might be better: ‘raw’ coil, or a coil surrounded by water and a pipe?
Agitation, anyone?...
Besides the maximum temperature of the heating surface, I also mentioned "...the amount of time that slurry is in contact with the barrier material...", which should lead us to consider agitation. Now, unlike insulation, it could not be said that agitation is required, but it would certainly be strongly recommended. As I said in another blog post, there are at least two fairly fundamental reasons for agitation. Here, we add to those reasons by saying that we have two additional reasons for agitation. The first I've already mentioned: the longer static slurry stays next to the hot surface, the more likely it is to form a crust. But crust-forming is apparently mostly dependent on the temperature of the heating surface, so the second here-and-now reason for agitation is that it brings lower temperature slurry in contact with the heating surface (increasing the rate of heat transfer, right?), and likewise distributes the heat more quickly throughout the digester. These things, to circle back around, are accompanied by a more rapid reduction in the temperature of the heating surface, reducing crusting more directly.
Besides, where heat is diffused through the slurry by mere conduction rather than being ‘mixed in’ by good agitation, then (for example) the slurry near the walls of the digester is likely, most of the time if not always, to be colder than the slurry near the heater, and that will mean less biogas will be produced for any given HRT. That is, the temperature in various parts of the digester will necessarily vary, and so it becomes hard to take valid measurements to control the heating process and generate data. Are we measuring the temperature near the outside walls? Then we may well think the digester is colder than it is, on average. Are we measuring the temperature of the slurry near the heater? We will think the digester is warmer than it is, on average.
The bottom line once again: if you can, agitate the digester.
Surface temperature maximum and heat transfer rate...
Now, returning to the idea that we are moving heat from one fluid to another through a barrier, we know that we will have to heat the barrier material at the very least to that design temperature (say, 30°C-35°C, 85°F-95°F): that establishes the minium temperature at the surface. But as we said in the beginning above, the greater the temperature differential between the heated fluid and the fluid to-be-heated, the faster that energy moves from hot to cooler. So to make the most efficient use of this pipe heater, we want to raise the temperature beyond the design temperature. Indeed, we want it to be as high as possible. And what is that maximum? For my money, it’s a temperature below the sparsely reported values that cause caking or crusting on heated surfaces. Call it something below 50°C (122°F).
As well, we have to be able to put heat in at a rate that exceeds the rate of heat loss to the digester, through heat leaking through the walls, or heat that is lost with exiting heated effluent and heat that may be required to heat colder incoming new slurry. Of course, more heat is lost if the weather is colder, if the wind is blowing, and so on, so when we design our heater, we should design it for those ‘worst case’ conditions. (See chapter 28, “Space Heating” in The Complete Biogas Handbook, for information about the simple math which is necessary to determine the heat loss under worst case conditions. That chapter is about heating rooms and houses, but the math works just as well for calculations regarding heating a digester. Click the ‘book button’ on this page to purchase a copy.) These considerations and calculations will impact the wattage of the electric heat coil you choose, the surface area of the pipe, and so on.
But the Goldilocks principle here is that we should not raise the temperature of the barrier material very much above the target temperature. To achieve that, realize that the amount of heat we put into the fluid-to-be-heated is determined not only by the temperature of the directly heated fluid, but also by how much of it there is: obviously, there is more heat or energy in a gallon of water at some temperature than there is in a teacup at that same temperature. Likewise, as we said above, we like having a greater surface area for the barrier, and as thin a material as is possible, since these allow a more rapid heat transfer.
The pipe used...
To achieve all these various ends, I am going to be using 4" pipe, ASTM 2729, or class 200, which is fairly thin pipe, and again of course thinner is better for our barrier material. (This kind of pipe is also less expensive than the standard schedule 40 pipe, if you can get it. I know from experience it’s hard to get around New York City, for example) If the electric heat coil you use is the same as mine, it will fit inside a 3" pipe; or if you can find an electric heat coil that is smaller and flatter, then you might be able to use even smaller diameter pipe. That may be important if you are trying to fit a heater of this type into a digester that has limited access to the interior, such as an IBC digester.
I chose 4" pipe both because it is fairly inexpensive, but also because it gives me more surface area, important to the physics of heat exchange. In the present design, the pipe, with a diameter of 4.125", will be 40" long, and will therefore have a volume (π * r2 * length) of 560 in3, or about 2.5 gallons. Given that I am not using the HEx units, all four of which together had a volume of about 25 gallons, the new heater results in a net increase in total slurry volume (8.5% more; not bad).
Yet some may wonder: “Hey: You’re heating water inside this thin pipe, and it’s not even CPVC, which is pipe designed for hot water. Won’t this pipe melt?”
Well, no, actually. In the first instance, we make sure that the heating element never contacts the pipe directly. Then further, the pipe won’t melt unless it gets to 170°F-180°F, and standard PVC will not even start to get soft until it gets to about 140°F. (You could look it up.) And in our design, we put an overtemperature switch inside the pipe which is normally closed (it ordinarily allows electricity to flow), but which opens (shutting off the electricity) when it gets too hot. In this design, we can choose switches (I’ve been using KSD301’s: check links) that open at 40°C, 45°C, or 50°C (respectively, 104°F, 113°F, and 122°F). All that gives us our Goldilocks sweet spot for the maximum temperature of the working fluid, the water inside the pipe: at or above ~85°F, and below ~125°F.
The control electronics...
The only other thing we need, then, is the means by which we sense the temperature in the digester and turn the electric heat coil on or off accordingly. In another blog post, “SPN-17 (Instrumentation): Minimalist heater/pump control system”, I have described and provided pictures of the PID controller (and the relays, etc.) which can be used to sense the temperature of the digester according to a set-point that you can establish.
When the temperature probe attached to that PID informs it that the temperature has fallen below the set-point, it will switch electricity to the electric heat coil on. The coil will heat up, the water surrounding it will heat up, and heat will begin to pass through the pipe to heat the slurry. If the water in the pipe gets warm enough to trigger the overtemperature switch, then the switch will open, turning off the electric heat coil. The water cools down some, the switch closes; and this cycle continues as long as the digester is not at the set-point/design temperature.
Just a note: If you read the blog post just mentioned, you will realize that the overtemperature switch does not directly turn off the electric heat coil. Rather, it shuts off the voltage controlling the PID, which in turn shuts off the power to a relay, and is in fact that relay which switches power to the electric heat coil on or off. Those parts and that sequence are required because the electric heat coil draws so much current it might burn out the overtemperature switch, and it would certainly burn out the PID switch. The shorthand is still valid: the overtemperature switch opens, shutting off power to the electric heat coil.
Understanding all that, consider the wire bundle that attaches the pipe heater to the outside world. If you think about what I've said— or if you’ve read the blog post I just mentioned— you will realize that we need six wires in that bundle: two large wires to power the electric heat coil, two small wires for the temperature probe (although these are usually held together inside one tube of insulation; so it looks more like one wire), and two small wires for the overtemperature switch.
(Larger image? Click on any image below...)
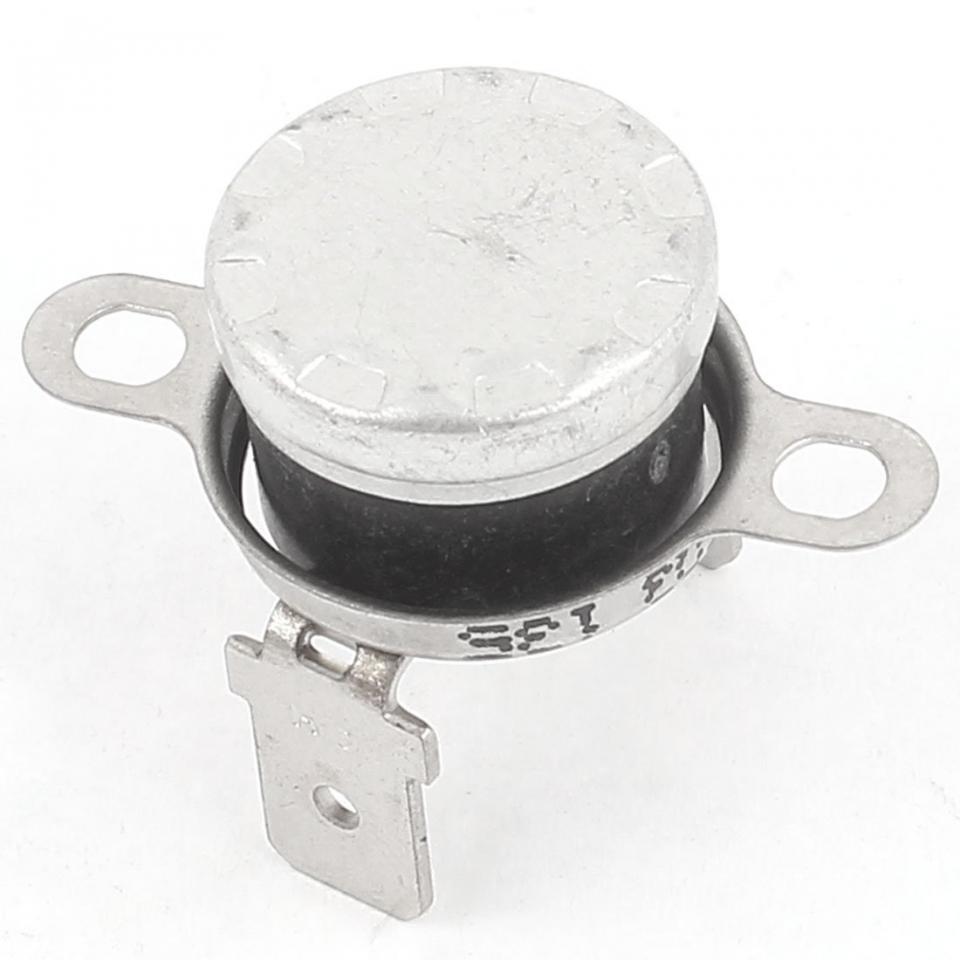


These simple bimetallic overtemperature switches, by the way, are rated at 50,000 on/off cycles (or 100,000. depending on where you look). It is pretty important that the switch does not fail in the closed condition (right?), since then the electric heat coil could, at least conceivably, get the water in the pipe really hot, and melt through it or boil it and burst the pipe, or what-have-you. So if you are the sort that likes to wear suspenders and a belt, you can use two switches, in series. I kinda doubt it’s really necessary, however. Still.
The wires for the heater and the overtemperature switch(es) should go through a standard pipe cap, of the size appropriate for your pipe. The hole can be waterproofed through a careful use of hot glue, which is usually made from ethylene-vinyl acetate (EVA) copolymers. This should not be toxic to the bitty biogas buddies. (EVA is considered to be a safe alternative to PVC.) If you need to splice the wires on the heater to get a long enough run, you can use the hot glue and some shrink-wrap tubing to waterproof the soldered connections too. As well, of course the overtemperature switch itself should be surrounded by hot glue to waterproof it. (Some of these switches come with an aluminum collar around them which can slip up and down. When down, it can short the two spade connectors for the switch, so hot glue it up, away from the connectors.)
The electric heat coil should be kept from contacting the sides of the pipe through the use of wooden offsets. (Again, as long as the overtemperature switch(es) are working properly, the heater will never get hot enough to char the wood.) Put the cap on one end, and you can use PVC glue on this if you want. Fill the pipe with water and put on the other cap (with the wires going through it), but do not glue this cap: you may, at some point, want to replace the electric heat coil or whatever, and the water in the pipe should never be under pressure, unless things go wrong and the water boils...)
For the sake of simplicity, you can put the temperature probe from the PID down along the wire bundle too; maybe about half-way down, and then the whole thing becomes one unit that slides in or can be taken out (say, for an IBC digester), or which can be easily placed inside [The_Cube]. In any case, if your digester is well-agitated and well-insulated, the exact placement of the PID temperature probe is not critical, because the temperature inside the digester will, in that case, be pretty nearly the same almost anywhere.
A final note: The pipe should be about as long as the digester is wide— and very importantly it should be slightly tilted, at, say, 15°. Where the electric heat coil is then at the lowest part of the pipe, the water inside will be heated at the lowest part of the pipe, and we can expect that the hotter water will convect up into the top curve of the pipe, and then up along the length of the pipe to its highest point. As the water releases its heat and cools, that cooler water will flow back down the bottom of curve of the pipe, and then down to the lowest part of the pipe. Given that flow, the entire surface of the pipe will transfer heat to the digester. What this implies for an IBC or other digester where you expect to push the heater in, and maybe sometimes pull it out, is that the wire should be wrapped up along the pipe and held with one or several zip ties, so that when the wire bundle is held up, the pipe can likewise be held up at the proper tilt inside the digester.
And that’s it. A large thin-wall pipe, two caps, an electric heat coil, some wood offsets and hot glue, one or two overtemperature switches, a PID, a relay and the wires. Insulate, agitate, heat. My gift to you.
| # | Description | Cost (@9/19) |
Link |
|---|---|---|---|
| A | Heater coil | $18.10 / $14.99 | 2500W / 1500W |
| B | GFCI outlet | (widely available) | |
| C | Solid State Relay (SSR-40-DD; plus heat sink) | $8.99 | here |
| D | Uxcell 2" aluminum heatsink for SSRs | $4.93 | here |
| E | Power supply (120v in, 12v out) | $7.98 | here |
| F | Over-temp switch KSD301 (x2); off at 40°C (plus other temps!) | $6.39 | here |
| F | Over-temp switch KSD301 (x4); off at 45°C | $3.88 | here |
| F | Over-temp switch KSD301 (x10); off at various °C | $8.99 | here |
| G | Inkbird PID (ITC-1000) | $15.88 | here |
| H | PID temperature probe (comes with PID) | — | — |