
SPN 03 of [The_Cube]: Panel left installation
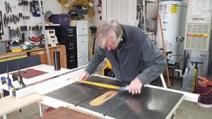
Installing the panel left
To install the panel left on the base, I decided once again to try something new in order to gain further experience, and extend the knowledge we all have to work with.
To install the panel left on the base, I decided once again to try something new in order to gain further experience, and extend the knowledge we all have to work with.
Once built, installing the panel right on the base is relatively quick. I am still experimenting with several aspects of this process, but overall it appears satisfactory to me. (To see the steps outlined below in a speeded-up video format, look at the bottom of this page...)

Of the four side panels that are part of [The_Cube], the panels right and left largely mirror each other, and the same is true of the panels front and back. Besides making things a bit simpler, there are two basic reasons why this is the case.
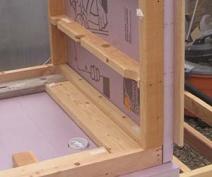
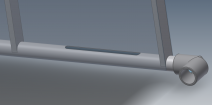
As you know, polypanel digesters are made of a sandwich: polysty is the meat in the middle: it insulates the contents of the digester. The 'bread' on the outside of the sandwich is inexpensive wood on either side to enable the polysty to resist the force of water pressure. The boards that end up outside the digester have screws that pass through the polysty and find ‘purchase’ in the inside wood, tying the polypanel sandwich strongly together.
Well, there’s no hiding from it: I screwed up. (I’m dyslexic regarding ‘right’ and ‘left’, just by the way. That’a pretty good excuse, don’t you think?)
Perhaps you know already: [The_Cube] holds 1.3 m3 of slurry, which has about the same density of water. (“1.3 m3” is a bit more than 340 gallons, or 46 ft3. The total volume of [The_Cube] is greater than any of those numbers because some of the space is devoted to the big bubble of biogas in the top 6 inches of the digester.)


[All images are ‘clickable’]
I have decided to begin blogging about the development of [The_Cube] (one of the first— in fact AFAIK, the world’sonly— kittable, shippable, insulated, heatable, small biogas digesters), as one of the things I will be