
SPN 07 of [The_Cube]: Single-pipe heating system
If you have paid any attention to the saga of [The_Cube], you know that up to this point I was aiming at heating the digester by circulating hot water. I have done a lot (a lot!) of work on designing a sump to hold residual water, a heater/pump to...


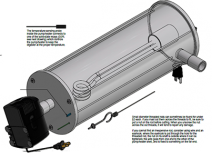
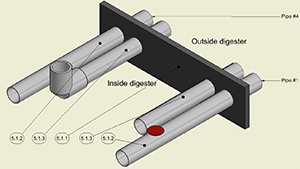
![Agitator for [The_Cube]](https://completebiogas.com/sites/completebiogas.com/files/styles/thumbnail/public/images/agitator-model_400px.png?itok=VS5bjjgN "Agitator for [The_Cube]")